In the last post I discussed why hex editors are useful for working with binary files. I also talked about XVI32 my free hex editor of choice. During this series I will be using XVI32 for examples, so if you are not on a Windows machine or if you want to use a different hex editor then you will need to adapt my examples.
So if you haven’t done so already, download XVI32. XVI32 doesn’t need installing, you can just unzip it and run it from there but you may want to copy it to a more memorable location and set up any relevant shortcuts.
In this post I’ll be taking more of a practical approach, I’ll start by talking about file signatures and then we’ll open up a few common file formats and take a look inside.
File Signatures
An extension does not make a type.
Or to put it more clearly, just because a file has the extension .png doesn’t mean there’s actually a png image inside. This is a very important lesson, since it is incredibly common for games just to give a common file format a different extension. When I was browsing the Call of Duty 4 files I realised instantly when I opened a file format up in a hex editor that it was just a zip with a different extension, meaning I could unzip it and see the files inside.
So how did I realise it was a zip at a glance? What kind of technomagery is this? Many files have a signature at the very start saying what format they’re in. It doesn’t matter what the file is called or what extension it has, if it has a signature then you have a way of identifying the file type. These are often called magic numbers because a piece of text can be represented as a sufficiently long number. In fact, any and all data can be considered just a very, very long number, but I may be straying off the point.
There are a number of very common file signatures you’ll see, including:
| Signature | Hex | Type |
| MZ | Executeable code (.exe) | |
| PK | 50 4B 03 04 | Compressed Zip (.zip) |
| Rar! | Compressed Rar | |
| BM | Bitmap Image (.bmp) | |
| FF D8 FF E0 ** ** 4A 4649 46 00 | JPEG Image (.jpg, .jpeg) | |
| 25 50 44 46 | PDF Document (.pdf) | |
| ‰PNG | PNG Image (.png) | |
| OggS | Ogg Vorbis Media e.g. audio, video (.ogg) |
For a more extensive list of file signatures check this page out.
Some Examples
Before continuing there are three examples you need to download, in the case of the images you will need to right click the link and hit “save as” or the equivalent option on your browser.
Example 1
Example 2
Example 3
Now for each of the examples, I want you to open it up in XVI32 and have a look inside.
Example 1
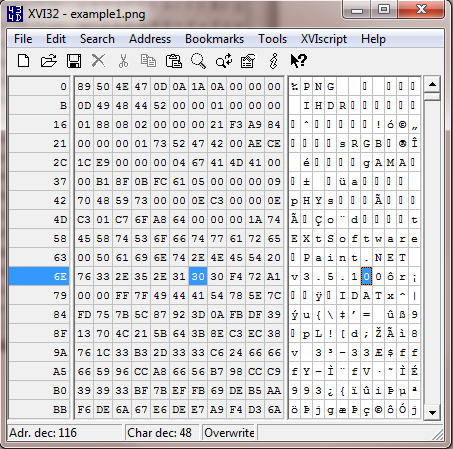
Once we open the first example in XVI32 we see that the file header starts with the per mil symbol followed by PNG in the text view. This file clearly is a PNG image.
Example 2
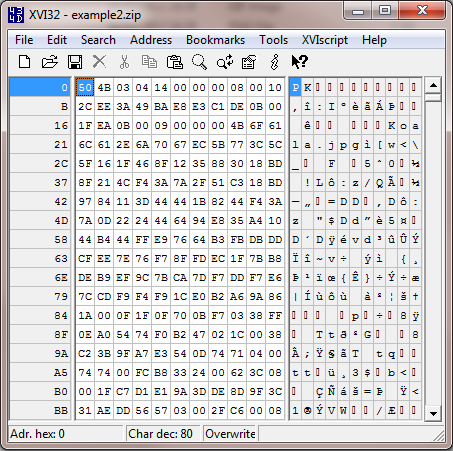
With example two, we see that the file signature is PK (named after the format’s author Phil Katz, but I often translate PK as Packed). This file is a zip as we can see in the table of signatures above.
Example 3
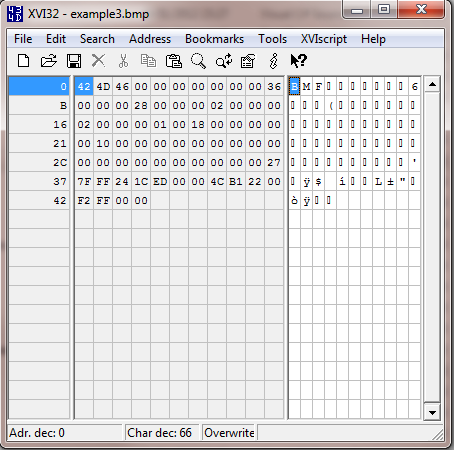
The final example has the file signature BM and is therefore a bitmap image. Ignore the F, that byte is actually part of a variable in the bitmap format that says how big the file is.
Example 3 In Depth
Let’s take a deeper look at the third example now that you’ve got it open. We know that the file is a bitmap image, so let’s take a look at it in Windows Photo Viewer. It’s a small image so you’ll have to zoom in.

If we open up the file in Paint, view it in Explorer or open its properties we’ll see the file is a 2 by 2 pixel image. I’ve created this small image to demonstrate the format more simply.
File Headers
In addition to the file signature, most files have a file header which includes some basic information about the file. In the case of an image this may include its dimensions and colour depth/quality. In the case of audio this may be the duration, number of channels and bit rate.
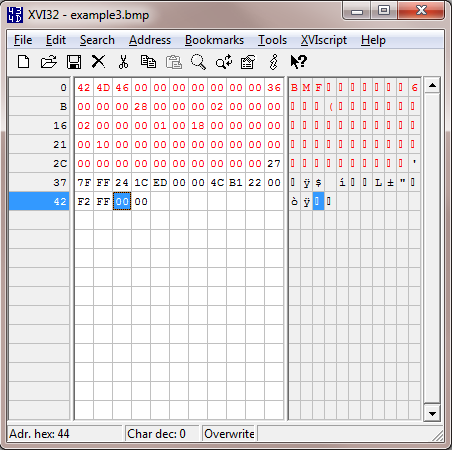
In the above image I’ve highlighted the file’s header. In the case of a Windows Bitmap the file header is 54 bytes long. To highlight a section in XVI32, select the first byte then select Edit -> Block <n> chars and type 54 in decimal mode.
You can see a couple of 02’s in the header, so a reasonable assumption would be one represents width and one represents height. We can also see an 0x18 which as a decimal is 24, so another reasonable assumption is that this is the colour depth specifying 24 bit colour. For now don’t worry about colour depth, I’ll talk about colour in a dedicated article later in this series.
After the header we have 16 bytes. Now we know there are four pixels (2×2) pixels in the image, so it’d be sensible to assume that those four pixels are represented in these 16 bytes.
Opening the file in Paint, we can use the dropper tool to pick the colour of each pixel. By going to edit colour, we can then see the colour in its red, green and blue components. You can do this manually, or use the figures I’ve shown below. I’ve also converted the values to hex for you.
Top Left
| Decimal | Hex | |
| Red | 34 | 22 |
| Green | 177 | B1 |
| Blue | 76 | 4C |
Top Right
| Decimal | Hex | |
| Red | 255 | FF |
| Green | 242 | F2 |
| Blue | 0 | 00 |
Bottom Left
| Decimal | Hex | |
| Red | 255 | FF |
| Green | 127 | 7F |
| Blue | 39 | 27 |
Bottom Right
| Decimal | Hex | |
| Red | 237 | ED |
| Green | 28 | 1C |
| Blue | 36 | 24 |
Now using the hex values worked out for each colour, we can spot them in the file. We can spot each three, in reverse order displayed as Blue, Green then Red. The reason for this different ordering is something I’ll talk about in a later article. We can also see that the bottom left pixel is first, followed by the bottom right pixel, then followed by two 00 bytes. Immediately after is the top left pixel, followed by the top right pixel and two more null (00) bytes.
Ignore the two sets of two null bytes, these are due to a nuance of a the bitmap format which means that it must pad the number of bytes representing a row of pixels to a multiple of 4 (so in this case we have 6 bytes representing a row, so it adds on 2 blank bytes to reach a total of 8 bytes and therefore a multiple of 4).
Editing Data
So now that we know where the colour data is in the file, let’s try changing it.
Let’s pick the top right pixel, which is yellow. Let’s change it to blue. Right now its represented as 00 F2 FF, so since this is in Blue Green Red order rather than Red Green Blue, changing the value to FF 00 00 will be a strong blue. To edit the values select the first byte in the “00 F2 FF” sequence and make sure that it says Overwrite in the status bar. If it says Insert then tap the insert key once. The insert key toggles between Overwrite and Insert modes. Now simply type FF 00 00 on your keyboard and hit save.
Opening the file up in Windows Photo Viewer and zooming in, we now see that the top right pixel is blue.
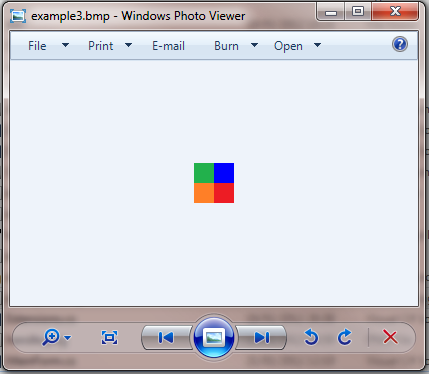
Congratulations, you have made your first successful and practical edit in a hex editor!
In this article, I’ve talked briefly about how to identify common file types regardless of their file extension. I’ve also shown some basic hex editing in a practical example – editing a bitmap image. In the next example I’m going to go into data types which combine multiple bytes to represent larger numbers.